How to Choose Cotton Yarn Dyed Check Fabric?
Choosing Cotton Yarn Dyed Check Fabric starts with understanding how the cloth will be used. In yarn-dyed fabric, colored threads create the check pattern before weaving. This can give the design a clear, woven-in appearance, though results vary with yarn, weave, and finishing. A shirt needs a different weight and drape from a tablecloth or lightweight jacket. Decide on the finished item before comparing swatches.
Look closely at the checks. Are the lines even, and do the colors match your intended palette? Hold a sample up to the light to judge its density, then feel it for softness, firmness, or surface texture. A quick wash test can reveal shrinkage, color changes, and wrinkling, but follow the supplier’s care guidance and test a spare piece when possible. Small details matter. Check the fabric width, fiber content, weight, and available stock against your pattern or production needs. Ask the seller for a specification sheet if details are missing; a product photo cannot confirm everything.
It is tempting to choose by color alone. I would pause there. A bold check may look balanced on a screen yet feel oversized when cut into sleeves or pockets. Compare the repeat size with your design, and request a physical sample when the order is important. There is no perfect fabric for every project. The right choice is the one whose appearance, handling, care needs, and quality suit the item you plan to make.
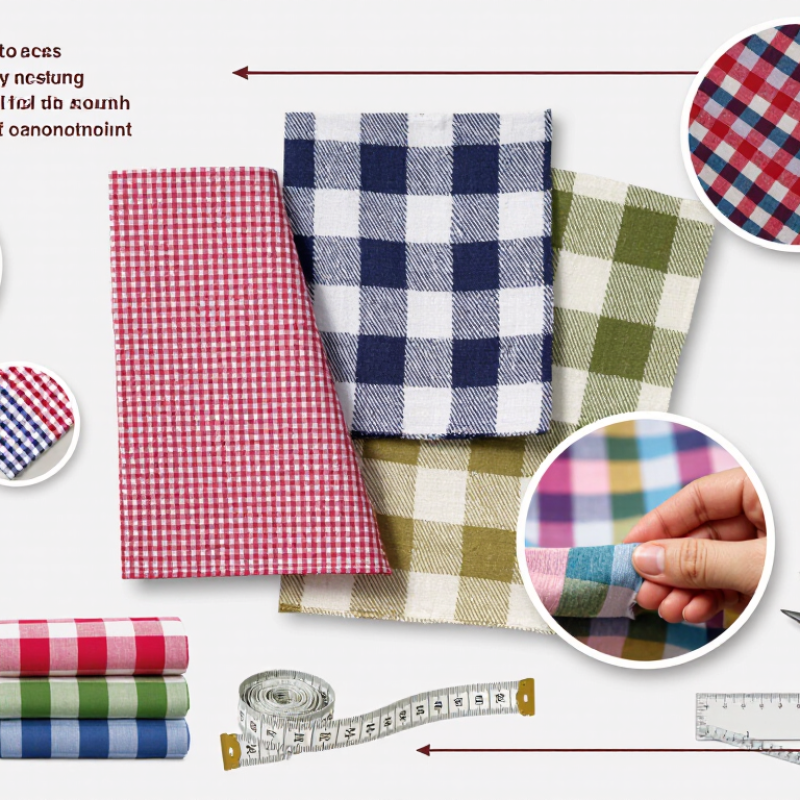
Specify Yarn Count (Ne 20–40) and Plain or Twill Check Construction
For cotton yarn dyed check fabric, choose the yarn count before settling on the check design. Ne 20–40 covers a useful range: Ne 20 produces a heavier, more substantial cloth, while Ne 40 feels finer and lighter. These are practical tendencies, not guarantees. Weave density and finishing also affect the final hand, so compare finished samples rather than relying on count alone. Small details matter.
Plain weave creates a balanced, crisp surface where check lines read clearly. It suits shirts, lightweight home textiles, and designs that need a neat appearance. Twill introduces diagonal ribs and usually gives the fabric a softer drape. Its texture can make a check look less flat, though the pattern may appear different under changing light. Check both sides.
Specify the count, weave, finished weight, and check repeat in the fabric brief. Also state whether the check should align across seams; matching can increase cutting waste. Ask for a sample with the actual yarn colors, since dyed yarns may look different together than in separate shade cards. Test washing and shrinkage before approving bulk production. Not every first sample will be right. Adjust one variable at a time, or the reason for a change may be unclear.
Match Fabric Weight to Use: 100–150 g/m² for Lightweight Shirting
For lightweight shirting, 100–150 g/m² is a useful starting range for cotton yarn-dyed check fabric. At this weight, a shirt can feel airy and drape easily, while the check remains visible. It suits warm-weather shirts, relaxed blouses, and children’s clothing. Feel it first. Weight alone cannot tell you whether a fabric will feel crisp, cling, or turn sheer under bright light.
Check the cloth against a window, then test a small swatch after washing. A 100 g/m² fabric may need a lining or careful color choice, especially with pale checks; closer to 150 g/m² often gives more coverage and structure. Yarn size, weave density, and finishing all affect the result, so treat the range as a guide, not a guarantee.
Textile Exchange’s Materials Market Report 2024 estimates that cotton made up about 20% of global fiber production in 2023. That market context helps explain cotton’s continued relevance, but it does not establish a shirting-weight standard.
One caveat: a crisp finish can make a light fabric seem sturdier than it is. Order a sample and judge it after laundering.
Test Colorfastness with ISO 105-C06 and AATCC 61
With cotton yarn-dyed check fabric, color can behave differently across light and dark yarns. Check colorfastness before approving a fabric, especially when contrasting shades meet at the woven intersections. Request testing under ISO 105-C06 or AATCC 61, and confirm the exact procedure with the laboratory. These standards assess color change and staining during accelerated laundering, but their test conditions are not interchangeable.
Submit a representative production sample, not just a small showroom swatch. Include the darkest check, pale yarns, and finished fabric, since dyeing, washing, and finishing can affect results. The test report should identify the method and conditions used, then record color change and staining on adjacent fabric. Review the results against your product’s care instructions and agreed quality limits. Small details matter.
A passing result helps, but it cannot predict every household wash. Water temperature, detergent, load size, and repeated cycles vary. A neat-looking swatch can still disappoint. That limitation is easy to forget. If the check combines very dark and very light yarns, test those contrasts closely and discuss any borderline result with the lab. Keep the report tied to the fabric lot, and retest when yarn sources, dyeing, or finishing change. You may not need a test for every minor variation, but assuming all lots behave alike is a risk worth questioning.
How to Choose Cotton Yarn Dyed Check Fabric? — Test Colorfastness with ISO 105-C06 and AATCC 61
Color-change gray scale reference for evaluating fabric after washing
This chart shows the standard 1–5 gray scale reference, not test results for a particular fabric. Higher grades indicate less visible color change. Compare swatches using the ISO 105-C06 or AATCC 61 washing procedure that best matches the intended care conditions, and assess staining separately. Agree on any required pass grade with your buyer; there is no single grade that applies to every product.
Set a ≤3% Shrinkage Target Using AATCC 135 or ISO 6330
How to Choose Cotton Yarn Dyed Check Fabric?
Set a ≤3% Shrinkage Target Using AATCC 135 or ISO 6330
Cotton yarn-dyed checks can shift after washing, changing both garment size and pattern alignment. Set a maximum 3% dimensional change as your purchasing target, then verify it before bulk production. AATCC 135 and ISO 6330 describe controlled laundering and drying procedures; neither guarantees a particular shrinkage result. Specify the test method, wash settings, drying method, and fabric direction in your request for a laboratory report.
Check lengthwise and crosswise change separately. For example, a 500 mm test mark that measures 488 mm after washing shows 2.4% shrinkage. That meets the target, but repeat testing matters: finishing, yarn tension, and drying can affect results. Review the actual report, not just a supplier’s general claim. A small mismatch in the check repeat can still be noticeable on a shirt front.
Approve Check Repeat, Shade Bands, and 4-Point Inspection Before Bulk Order
When choosing cotton yarn dyed check fabric, approve the repeat on finished cloth, not only on a screen or paper sketch. Record the check size in both directions, along with the usable width. A 2 cm shift may look minor on a swatch but become obvious across a shirt front. Check how the pattern aligns at seams and after washing. Shrinkage can change the repeat slightly.
Shade bands matter because yarn lots and finishing can shift the color. Review bands side by side under consistent lighting, such as a standard daylight booth, and compare them with the signed shade standard. Set acceptable variation before bulk production. Keep a physical reference swatch; digital images can distort navy, cream, and muted red. Even careful lighting is not perfect.
Agree on the four-point inspection rules before ordering. Specify the scoring method, defect limits, and inspection rate per roll; systems can differ. Inspect for yarn slubs, broken checks, stains, and width variation. Record defects with roll numbers and photos, then review the report before shipment. Sampling only roll ends is weak. Check points along the roll, too. I have seen a neat sample hide a rough middle section.
How to Choose Cotton Yarn Dyed Check Fabric? - Approve Check Repeat, Shade Bands, and 4-Point Inspection Before Bulk Order
| Approval Check | What to Verify | Practical Approval Target | Bulk-Order Control | Record or Evidence |
|---|---|---|---|---|
| Fabric specification | Fiber content, weave, yarn-dyed construction, finished width, and fabric weight. | Match the approved specification and sealed sample. State tolerances for width and weight in the purchase agreement. | Check the mill test report and verify width and weight on goods from each production lot. | Signed specification sheet and approved swatch. |
| Check repeat | Measure the horizontal and vertical repeat from the same reference point, including the placement of the main check lines. | Approve repeat dimensions in inches or centimeters. A tolerance such as ±3% may be used if agreed before production. | Compare production fabric with the approved repeat; check that the pattern does not drift or change scale across the width. | Repeat measurement, marked reference photo, and approved pattern sample. |
| Pattern alignment | Check whether horizontal and vertical lines are straight, square, and consistent at the fabric edges and center. | Set an agreed bowing or skewing limit, measured across a stated fabric length; do not rely on visual approval alone. | Inspect fabric laid flat and confirm alignment is suitable for the intended cutting and garment layout. | Inspection notes and photos showing the full fabric width. |
| Shade bands | Compare the warp and filling colors, check colors, and fabric lots under consistent lighting. | Approve a shade band showing the acceptable light-to-dark range. Compare samples under a stated light source, such as D65 daylight. | Group rolls by shade lot and avoid mixing visibly different lots within one garment or order without approval. | Signed shade band, lot references, and light-source record. |
| Colorfastness | Assess color transfer during washing, rubbing, and exposure to perspiration where relevant to the end use. | Agree on the applicable test method and minimum grade before bulk production; requirements vary by product and market. | Review test results for representative colors, especially dark shades and high-contrast checks. | Test report identifying method, specimen, and results. |
| Shrinkage and dimensional stability | Measure lengthwise and widthwise change after the specified washing and drying procedure. | Set maximum shrinkage limits based on the garment design and care instructions; confirm them on the approved sample. | Use the same test procedure for approval and production checks, and allow for the agreed shrinkage in pattern planning. | Before-and-after measurements and test conditions. |
| Four-point inspection: defect scoring | Assign penalty points to each defect by its longest dimension; score holes and other serious defects according to the agreed inspection rules. | Common four-point practice: up to 3 inches = 1 point; over 3 to 6 inches = 2; over 6 to 9 inches = 3; over 9 inches = 4. A single defect is commonly capped at 4 points. | Use the same scoring rules for every inspector and record defect location, type, and score. | Roll inspection report with a defect map or roll ticket. |
| Four-point inspection: acceptance level | Calculate the total penalty points against the inspected fabric area. | Agree on the maximum points per 100 square yards before shipment; 40 points per 100 square yards is a commonly used commercial benchmark, not a universal requirement. | Record inspected length and usable width. Calculate: total points × 129,600 ÷ (length in inches × width in inches). | Inspection calculation, roll length, width, and final pass/fail decision. |
| Roll and lot traceability | Confirm roll numbers, dye or shade lot references, roll lengths, and inspection status. | Require clear, legible identification on each roll and packing list. | Keep shade lots separate and reconcile roll labels with the inspection records before cutting. | Roll list, labels, packing list, and lot-level inspection records. |
| Pre-production sign-off | Review the final color, check repeat, hand feel, construction, and approved inspection criteria together. | Release bulk production only after the responsible buyer or quality representative approves the sample and written specification. | Retain a sealed reference sample and use it for production and shipment comparisons. | Dated approval record and retained reference sample. |
Note: Inspection tolerances and test requirements should be agreed in writing before the bulk order. Confirm that the four-point scoring rules and inspected-area calculation are applied consistently.