7 Tips for Choosing Sieve Components
Choosing the right Sieve Components can make the difference between steady production and repeated stoppages. A screen that looks suitable on paper may blind quickly when handling damp powder. A frame that fits the machine may still allow leakage if its seal is compressed unevenly. Small details matter.
Selection starts with the material and the task. Particle size, moisture, abrasiveness, temperature, and required throughput all influence the choice of mesh, support, seals, and frame materials. Equipment design matters too. Check the machine’s dimensions, vibration pattern, and cleaning method before ordering replacement parts. A few millimeters of mismatch can create trouble.
These seven tips offer a practical way to compare components without relying on price alone. They cover fit, material compatibility, mesh specifications, durability, sanitation, supplier documentation, and maintenance needs. Ask for measurable specifications, such as aperture tolerance and material grade, rather than broad claims like “heavy duty.” Confirm that components suit the actual operating conditions, then test them under representative loads when possible.
There is no universal best option. A fine mesh may improve separation but reduce capacity or require more frequent cleaning. That trade-off is easy to overlook. Even experienced teams can miss it when production pressure is high. Treat the recommendations as a starting point, and verify critical choices with equipment documentation and qualified technical support.
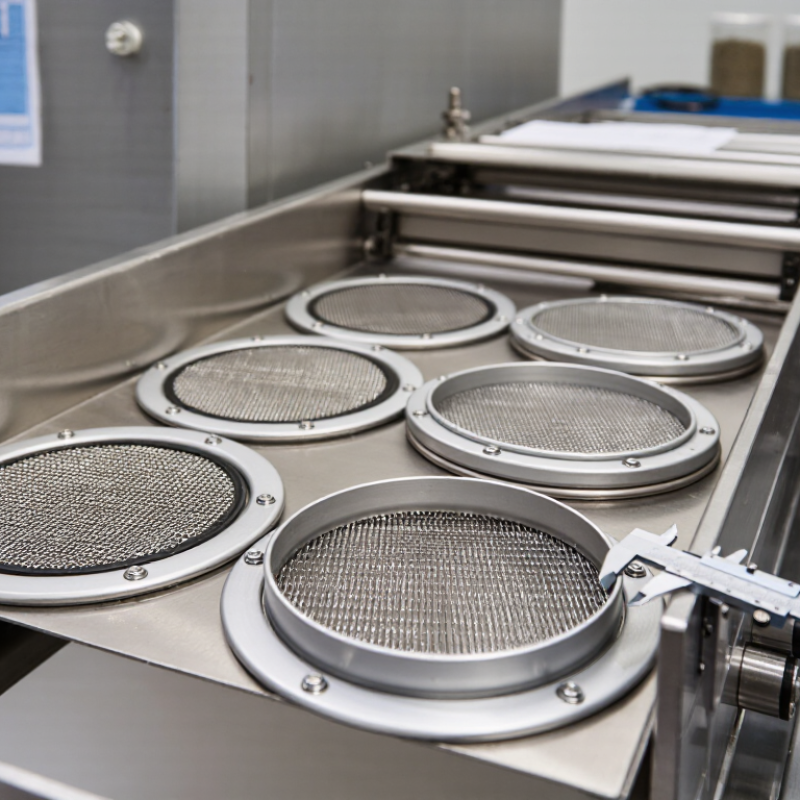
Understand the Sieve’s Purpose and Required Separation
Choosing sieve components starts with defining the separation, not selecting a mesh by habit. Identify the material, target particle range, required throughput, and whether the goal is sizing, screening out debris, or recovering a fraction. A flour-like powder behaves differently from damp granules. If particles cling or carry moisture, a very fine screen may blind quickly. Small details matter.
Tip: Write down the acceptable particle-size range and the material’s condition during operation. Then compare the mesh opening with the smallest particles you need to retain or pass. Aperture size is not the only factor: wire thickness and open area affect capacity and separation sharpness. A smaller opening may improve retention but reduce flow. Test a sample when the feed varies.
Tip: Match the frame and screen material to the load, cleaning method, and operating environment. Check that the frame holds tension evenly and that edges do not leave bypass gaps. In practice, a component that works well on a clean sample may struggle with a full, dusty feed. That is easy to miss. Keep room for adjustment, and record the settings that produce a stable separation; early assumptions sometimes need revisiting.
Select Mesh Material and Aperture Size
A sieve’s mesh material should suit both the sample and the cleaning process. Stainless steel is often selected for durability and resistance to corrosion, while polymer mesh can be useful when lighter handling or reduced metal contact matters. Check the sample’s chemistry, operating temperature, and cleaning agents before choosing. A mesh that looks suitable may still wear quickly under repeated brushing. Small details matter.
Aperture size is the clear distance between neighboring wires, not the mesh count alone. Choose an opening based on the particle size you need to retain or pass through. For example, if separating coarse grains from fine powder, compare the target cut size with the sieve’s stated aperture and tolerance. Particle shape matters too: thin flakes may pass through an opening that would hold a round particle of similar width. Real samples are rarely uniform, which makes selection less tidy than a specification sheet suggests.
Check that the selected aperture matches the required test method, and keep the manufacturer’s material and tolerance information with the sieve record. If the result is critical, inspect the mesh for damage and verify its condition at suitable intervals. A quick visual check helps, but it cannot confirm every opening. That limitation is easy to overlook.
Check Frame Design and Equipment Compatibility
A sieve frame must fit the machine, not just the product specification. Check its outside diameter, depth, and seating surface against the equipment drawing. A few millimeters of mismatch can cause rocking, uneven tension, or powder collecting near the rim. Look closely at the frame joint, too. Smooth, accessible seams are easier to inspect and clean than narrow crevices. A tidy drawing can still miss a real-world snag.
Tip: Confirm the frame’s material, screen attachment, and clamp arrangement with the equipment supplier or maintenance team. Then compare them with the parts already installed. Check clearances around the lid and discharge outlet, and verify that the frame can be lifted without catching on nearby fittings. Small details matter.
Compatibility includes how the sieve behaves during operation. A frame that sits correctly when empty may shift under vibration or a full material load. Ask how the design handles the machine’s motion, and inspect contact points for wear after a trial run. Record the measurements and any changes made. It is easy to assume two frames are interchangeable; that assumption deserves a second look. Cleaning access and replacement screen availability also affect downtime, so check both before ordering.
Match Components to Operating Conditions
Match each sieve component to the real operating window, not just the product sheet. Mesh, support frame, seals, and clamps all face different stresses. The U.S. Geological Survey’s Mineral Commodity Summaries 2024 estimated U.S. crushed-stone production at about 1.5 billion tons in 2023. In abrasive service, that scale makes wear resistance and quick inspection practical priorities. Small details matter. Check whether sharp particles attack the mesh, and whether vibration loosens fasteners or strains the frame.
For wet or corrosive feed, verify that mesh, frame, and gasket materials suit the liquid and cleaning chemicals. For hot service, check the full assembly’s temperature limits; a heat-tolerant screen can still fail at its seal. ASTM E11 specifies requirements for woven-wire test sieves, including aperture tolerances. Use it when setting laboratory verification criteria, but do not assume those test-sieve requirements guarantee production-screen performance. They do not. Confirm fit and durability under actual load.
Record feed moisture, particle shape, peak temperature, throughput, and cleaning method before choosing components. Then run a controlled trial and inspect for blinding, cracked wires, gasket swelling, and uneven wear. A fine mesh may improve separation but reduce capacity when damp particles cling to openings. That trade-off is easy to underestimate. I would also revisit the choice after the first maintenance cycle; operating conditions often differ from the neat figures on a specification sheet.
7 Tips for Choosing Sieve Components - Match Components to Operating Conditions
| Tip | Operating Condition | Component to Consider | Selection Guidance | What to Verify |
|---|---|---|---|---|
| 1. Match the screen opening to the cut size | Dry or wet separation where product size control is the main requirement. | Woven wire cloth, perforated plate, or modular screen panels. | Select the opening shape and size for the required separation. Woven wire can provide a high open area; perforated plate and molded panels may suit larger openings or heavier-duty service. | Confirm the specified aperture, allowable tolerance, wire or panel thickness, and whether the opening refers to a nominal or clear dimension. |
| 2. Account for abrasion and impact | Sharp, coarse, or fast-moving feed; high drop heights; or frequent impact loading. | Thicker wire cloth, perforated plate, or wear-resistant rubber or polyurethane panels. | More robust media can improve wear life, but thicker elements may reduce open area. Use feed-box liners or impact protection where material strikes the screen directly. | Check particle shape, feed rate, drop height, bed depth, and the equipment maker's limits for panel weight and support spacing. |
| 3. Choose media for moisture and blinding risk | Wet, sticky, damp, or near-size material that can block screen openings. | Slotted or anti-blinding media, flexible panels, and suitable spray or wash components. | Openings designed to reduce pegging may help with near-size particles. For wet screening, make sure the deck and drainage arrangement suit the slurry or wash-water load. | Assess feed moisture, solids concentration, particle shape, water quality, and whether the process requires washing or dewatering. |
| 4. Check temperature and chemical exposure | Hot feed, heated wash water, corrosive liquids, or cleaning chemicals. | Metal screen media or polymer panels selected for the specific service. | Material suitability depends on the actual temperature, chemical concentration, exposure time, and operating cycle. Do not assume that all stainless steels or polymers are suitable for every process. | Obtain the component material specification and confirm its allowable service conditions with the equipment or material supplier. |
| 5. Balance open area with strength | High-capacity screening, limited deck area, or applications sensitive to reduced throughput. | Screen media with an appropriate open area, plus correctly spaced support bars and cross-members. | Greater open area can increase the available screening area, while larger or thicker support elements can reduce it. Select the complete deck arrangement rather than evaluating the panel alone. | Compare open area, panel strength, support spacing, bed depth, and the required capacity at the target separation efficiency. |
| 6. Match tensioning and fastening to the deck | Vibrating operation, frequent panel changes, or decks subject to repeated loading. | Compatible tension rails, clamps, bolts, seals, and panel-retention hardware. | Use a fastening system designed for the screen frame and media type. Correct tension and secure retention help prevent movement, leakage at panel joints, and premature damage. | Check frame dimensions, fastening layout, installation tension, access for maintenance, and the required inspection or retightening schedule. |
| 7. Plan for cleaning and maintenance | Fine screening, variable feed, frequent changeovers, or limited maintenance access. | Replaceable panels or cloth, cleaning balls or other approved anti-blinding devices, and accessible seals. | Choose components that can be inspected and replaced without unnecessary deck disassembly. Cleaning devices must be compatible with the screen construction and process material. | Review changeover time, spare-part availability, cleaning method, wear indicators, and safe access for inspection. |
Evaluate Durability, Maintenance, and Replacement Needs
A sieve’s service life depends on more than screen hardness. Abrasive feed, moisture, vibration, and cleaning methods all affect wear. Inspect mesh tension, clamp marks, and support rails during planned shutdowns. A loose panel may damage nearby components before its own failure becomes obvious. Small cracks matter.
Tip: Compare replacement parts by expected life, not purchase price alone. The U.S. Department of Energy’s Operations & Maintenance Best Practices guide reports potential energy savings of 5–20% from effective maintenance programs across facilities. That figure is not specific to sieves, but it shows why routine checks can matter. Record inspection dates, operating hours, and failures; even a simple log can reveal repeat wear patterns.
Replace components when damage changes separation quality, not only when a panel breaks. Watch for torn mesh, distorted frames, persistent blinding, or rising vibration. Keep a compatible spare screen and clamps nearby if delivery delays could halt production. I would still question any fixed replacement interval: feed conditions vary, and a calendar alone can mislead. Use inspection history and product-quality checks together.